Password Change
Your password has been successfully changed!
Something went wrong...
Enter Credentials
Enter Required Information
Secure VPN
To better protect the servers, applications, and student/faculty data, the Computing Sciences server environment is located behind a VPN. When not directly connected to the Computing Sciences network in the Loyola Science Center the use of the Pulse Secure VPN client is required.
Below are instructions for installing and using the Pulse Secure VPN client. If you're having trouble connecting to the VPN you can find some troubleshooting steps here.
Installing the Pulse Secure VPN Client (Windows)
- Download the Pulse VPN Client installation software. A valid Computing Sciences account is required to download. Installation requires administrative access.
Please Login to Download
- Double-click on the .msi file to launch the Installation Wizard
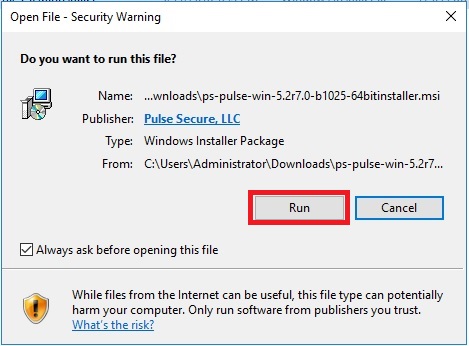
- If prompted with a Security Warning click the Run button
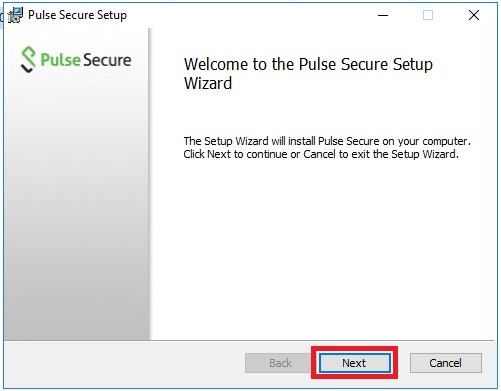
- At the Welcome screen click the Next button
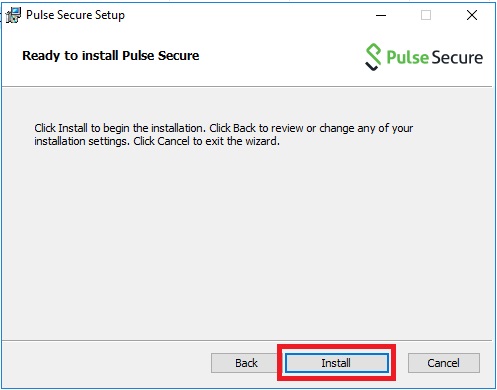
- Click the Install button to begin the Pulse Secure VPN client installation
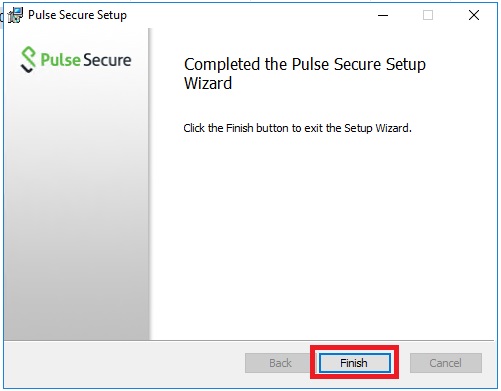
- Click the Finish button once the installation has finished
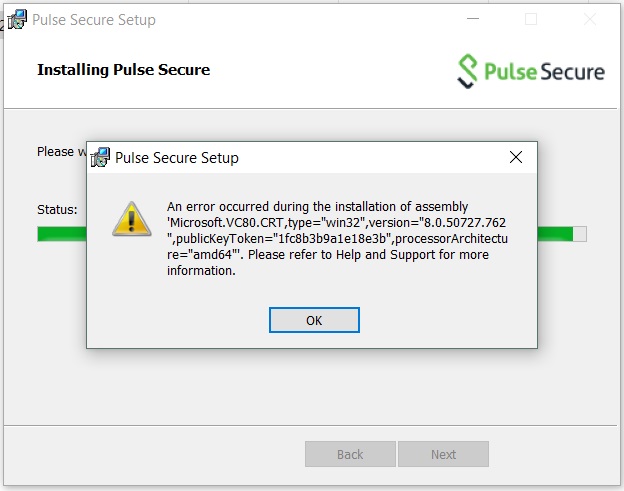
Troubleshooting Installation Errors
- Click OK on the error message and wait for installation rollback to complete
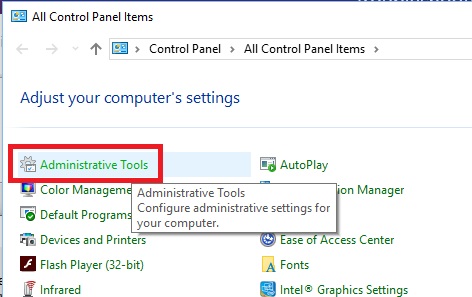
- Launch the Control Panel and click on Administrative Tools
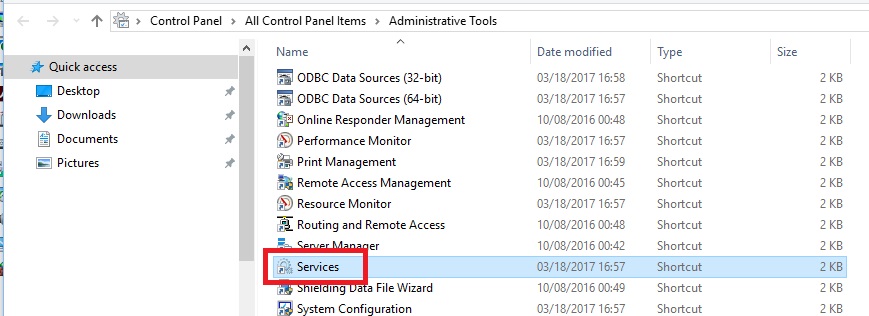
- Double-click on Services
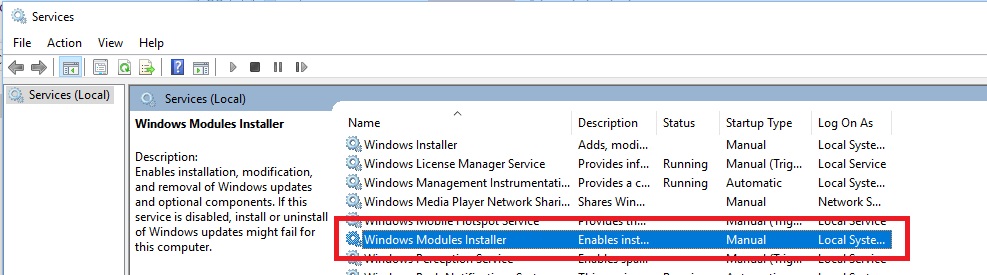
- Locate Windows Modules Installer service. If service is set to Disabled, double-click on the service and set to Manual
- Restart your PC and attempt installation of Pulse VPN client
Adding a VPN Connection
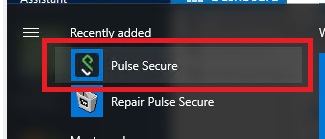
- Launch the Pulse Secure application
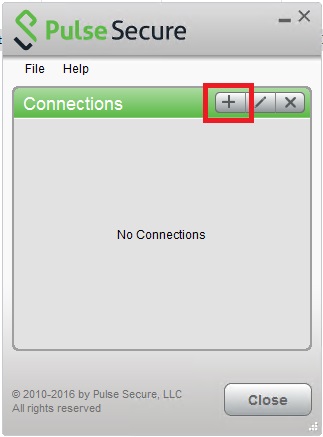
- Click on the Plus button to add a new connection
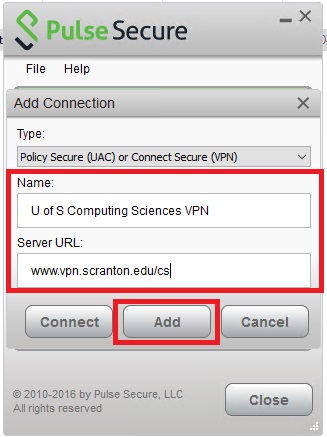
- Enter a name for the VPN Connection (Example: U of S Computing Sciences VPN). Use the following for the Server URL:
www.vpn.scranton.edu/cs
Click the Add button when complete
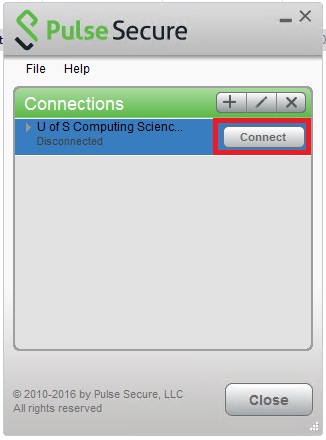
- Click on the Connect button to initiate a VPN connection
- When prompted enter your University R# and password. Click Connect when complete
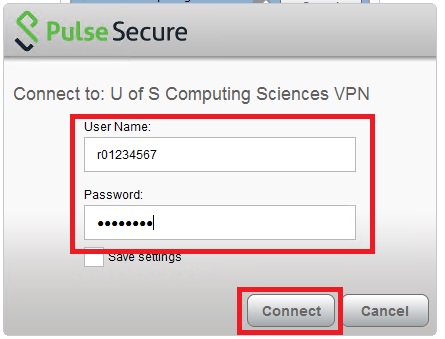
- Pulse VPN uses Duo for two-factor authentication. At the secondary password prompt enter the word "push" (no quotes) to receive a notification on your Duo mobile app or enter a six digit code from your Duo app or physical token. Click Connect when complete

- Verify your VPN connection shows as "Connected"
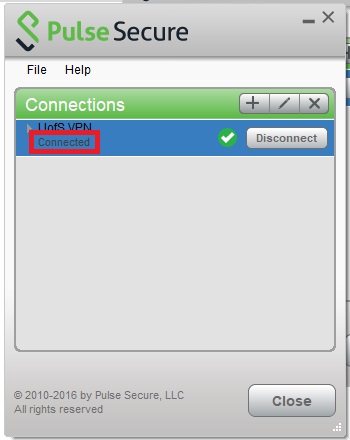
- To end your VPN session click on the Disconnect button
Secure VPN
To better protect the servers, applications, and student/faculty data, the Computing Sciences server environment is located behind a VPN. When not directly connected to the Computing Sciences network in the Loyola Science Center the use of the Pulse Secure VPN client is required.
Below are instructions for installing and using the Pulse Secure VPN client. If you're having trouble connecting to the VPN you can find some troubleshooting steps here.
Installing the Pulse Secure VPN Client (Windows)
- Download the Pulse VPN Client installation software. A valid Computing Sciences account is required to download. Installation requires administrative access.
Please Login to Download
- Double-click on the .msi file to launch the Installation Wizard
- If prompted with a Security Warning click the Run button
- At the Welcome screen click the Next button
- Click the Install button to begin the Pulse Secure VPN client installation
- Click the Finish button once the installation has finished
Troubleshooting Installation Errors
- Click OK on the error message and wait for installation rollback to complete
- Launch the Control Panel and click on Administrative Tools
- Double-click on Services
- Locate Windows Modules Installer service. If service is set to Disabled, double-click on the service and set to Manual
- Restart your PC and attempt installation of Pulse VPN client
Adding a VPN Connection
- Launch the Pulse Secure application
- Click on the Plus button to add a new connection
- Enter a name for the VPN Connection (Example: U of S Computing Sciences VPN). Use the following for the Server URL:
www.vpn.scranton.edu/cs
Click the Add button when complete
- Click on the Connect button to initiate a VPN connection
- When prompted enter your University R# and password. Click Connect when complete
- Pulse VPN uses Duo for two-factor authentication. At the secondary password prompt enter the word "push" (no quotes) to receive a notification on your Duo mobile app or enter a six digit code from your Duo app or physical token. Click Connect when complete
- Verify your VPN connection shows as "Connected"
- To end your VPN session click on the Disconnect button
Return to Student Resources